Showing posts with label Saturday Recipe Swap. Show all posts

Saturday, December 18, 2010

A Late Recipe, But.....


I was just so excited I had to tell you! 

Brian has been out of town on business since Wednesday morning.  I can't even begin to tell you how lonely I have been.  Yes, I have Addie, but there is something about knowing every day that your husband is coming home from work.  They say absence makes the heart grow fonder, and how true that is.  I missed my soul mate, confidante, buddy, best friend, love of my life. 

Addie hasn't understood Daddy's absence.  She kept asking over and over again, "Where the Daddy go?"  To which I would reply, "Daddy's working."  Her response was always, "The Daddy working so hard?"  In fact last night she told my mother-in-law, "I miss the Daddy," with the saddest little face ever. 

Thankfully, we have not been alone in the evenings.  Wednesday night was Dad's usual night to come for a visit. Then, my in-laws dropped by on Thursday night, and when they saw that I had given Addie our left over Baked Ziti and I had a bowl of cereal for dinner (really, what is the point of cooking a full meal when the man of the house is away?), they called me on Friday and asked me to join them for dinner and then to visit at their house for a bit. 

Friday night, Addie and I went to sleep in the office on the sofa bed (actually, we did that every night Brian was away) expecting Brian to drive home to us the following day.  Around 12:30 a.m., I suddenly woke up and noticed that I had a text from Brian from 11:30 p.m. saying "Call me".  I didn't want to wake him up if he had fallen back to sleep, so I didn't respond and dozed back to sleep. 

Around 4:30 a.m., I received a phone call from Brian, but, after one ring, he hung up.  Odd, I thought.  I debated whether I should call back or not.  Not to worry, a minute later Brian called back asking me to disarm the house alarm since he was pulling up in front of the house.  Can we say totally thrilled and excited!  I jumped up ran to our alarm pad, disarmed it, and waited for Brian to walk up to the door. 

Apparently, the hotel he had been staying in had a soccer team staying their for the night.  The last straw for Brian was when he heard a crash come from the next room.  He decided that he couldn't sleep anyway, so he might as well drive home.  His coworker also decided to leave and drive home, so they called each other to help each other stay awake during the 5 hour drive home.

This morning, Addie was beside herself when she saw Daddy.  She has been glued to him like a little magnet.
She helped me make Daddy coffee, and she "helped" me make Daddy a special crock pot/slow cooker dinner.  It is fast and easy and absolutely no work at all, but it smells awesome and looks beautiful while it is cooking.

Pork Roast

Ingredients

2 onions
2 potatoes (I used sweet)
2 green peppers
1 small bag of baby carrots
2-3 lb. pork sirloin
Adobo or salt
1 packet of Sazon

Directions

1. Rinse all veggies.  Chop the onions, peppers, and potatoes into large pieces and layer the potatoes, carrots, peppers, and onions in the slow cooker.
2. Rinse pork (something I learned from Mom... always rinse off your meat before cooking). Put ontop of veggies.
3. Sprinkle with Adobo or salt to taste and with the packet of Sazon.
4. Pour 1 cup of water into the slow cooker.
5. Cover and set on low for 6-8 hours or until thoroughly cooked.

I am sitting here with my whole family- Brian and Addie- smelling our dinner cooking.  This is what I call a perfect morning.

Saturday, December 11, 2010

Saturday Recipe Swap: Christmas Ham

Every newlywed wife wants to host her first big holiday meal whether it is for Easter, Thanksgiving, Christmas Eve, or Christmas Dinner.  I wanted to host our family for Christmas Eve our first Christmas as a married couple.  I decided that I would make a ham, but I had no idea what to do or where to start.  No problem!  Mom was only a phone call away.  Here was her recipe for Ham and Pineapple.  Delicious!

Ingredients

Ham
Pineapple rings and juice
Brown Sugar

Directions

Slice ham.
Put it in a pyrex dish of a suitable size.
Put rings of pineapple of the ham in a decorative way.
Spread the brown sugar over the ham and pineapple.
Pour remaining pineapple juice from can over the brown sugar.
Cover ham with aluminum foil or glass cover (depending on the type of dish you use).
Follow cooking direction on ham.
Keep an eye on it.

Saturday, November 20, 2010

Saturday Recipe Swap: Scalloped Sweet Potatoes with Thyme

This is another recipe from the Real Simple April 2010 issue.  The thyme adds a very different flavor, but it is a good flavor. 

Ingredients
  • 2 medium sweet potatoes (1 pound), peeled
  • 2 medium russet potatoes (1 pound), peeled
  • 2 cloves garlic, crushed
  • 2 teaspoons fresh thyme leaves
  • Kosher salt and black pepper
  • 2 1/2 cups heavy cream
  • Butter, for the foil
Directions
  • Heat oven to 400* F. In a food processor fitted with the thinnest (2 millimeter) slicing disk, slice the potatoes.
  • In a shallow 1 1/2 quart baking dishtoss the potatoes. garlic, thyme, 3/4 teaspoon salt, 1/4 teaspoon pepper.  Add the cream and press gently to submerge the potatoes.
  • Cover the dish with buttered foil, place on a rimmed baking sheet, and bake for 20 minutes. Remove the foil and bake until the potatoes are tender and the top is golden brown, 25 to 30 minutes more.

Saturday, November 13, 2010

Saturday Recipe Swap: Easy Cheesy Barbecued Sloppy Joes

One of my handy dandy little go-to cookbooks was a free little booklet that Sam's Club and Kraft colaborated on and gave away at Sam's about a year back.  Once again, Dad is responsible for getting ahold of this one for me (and to think, he used to tease me when I was a teenager because of my dislike of the kitchen).

Ingredients

1 lb. ground beef
1 green pepper, chopped
1/4 cup chopped onions
1 cup barbecue sauce
4 hamburger buns
4 slices cheese

Directions

Brown meat in large skillet; drain. Add vegetables; cook and stir until crisp-tender.
Stir in barbecue sauce; cook until heated through, stirring occassionally
Fill buns with meat mixture and cheese.

Saturday, November 6, 2010

Saturday Recipe Swap: Corned Beef and White Rice

My mother was an amazing cook.  She would look in her fridge, see what she had, and make an incredible meal with no recipe.  Many of what we called her "inventions" were never written down unfortunately, so we will never have some of those meals ever again. 

One of her meals was a corned beef "sauce" that she would make to put on white rice.  It was one of Dad's favorite meals.  As I was going through my recipe box, I came across the recipe for her corned beef.  I was beside myself! 

So for dinner this week (on Dad's night), we had Mom's Corned Beef and Rice.

Ingredients

1 can of corned beef
3 potatoes or frozen French Fries
1- 6 oz can tomato sauce
2 large tablespoons of Sofrito (can be bought in the Latin/Hispanic section of the grocery store)
1 packet Sazon con achote (also in the Latin/Hispanic section- sold as a box with multiple packets)
2 tomato sauce cans of water (12 oz.)
6 or more olives

Directions (get ready, these are super simple!)

In a large saucepan, crumble corn beef.

Add all remaining ingredients.

Cook for 25 minutes (medium heat) or until done. Done means the water and sauce have dried a bit.

Serve on white rice.

Saturday, October 30, 2010

Saturday Recipe Swap: Mexican Meatball Soup

A few weeks ago, Dad went for a haircut and saw the April issue of the Real Simple magazine sitting on the magazine rack.  After flipping through it, he knew it would be just the kind of magazine I would love.  He asked the barber if he could pay her for the issue, to which she told him to just take it. 

It was my first time looking through a Real Simple magazine.  I loved it! So many different real simple tips on doing everyday household chores.  For example, to light hard to reach candles, light the end of a long piece of uncooked spaghetti to make it easier to reach.  Who would have thought!

In tribute to his thoughtfulness, I have been making a new recipe on Wednesdays (Dad's night to have dinner with us) from the pages of April's Real Simple

Today's recipe is Mexican Meatball Soup.  So easy to make.  So packed with flavor.  Can be somewhat prepared ahead of time. Absolutely delicious (a-licious, as Addie would say).

Ingredients
  • 1 pound ground beef
  • 2 scallions, chopped
  • 1 cup tortilla chips, crushed plus more for serving
  • 1/4 cup chopped fresh cilantro plus sprigs for serving
  • 1/2 teaspoon ground cumin
  • Kosher salt and black pepper
  • 3 cups mild jarred salsa (about 1 1/2 16-ounce jars)- just get a 24 oz. jar and you are covered
  • 1 avocado, cut into pieces
Directions
  • Heat broiler. In a bowl, combine the beef scallions, tortilla chips, cilantro, cumin, 1/2 tsp. salt, and a 1/4 tsp. pepper. IShape the mixture into 1-inch balls (about 24) and place on a broilerproof baking sheet.  Broil until beginning to brown, 5 to 6 minutes.
  • Meanwhile, in a blender (or food processor), puree the salsa with 1 cup water.  Transfer to a large saucepan, add 2 cups water, and bring to a boil. Add the meatballs, reduce heat, and simmer until cooked through, 2 to 4 minutes.
  • Serve the soup with the avocado, cilatro sprigs, and tortilla chips, if desired.
Because I had to run to my mom-in-laws house for a bit (to see my adorable little nephew who is 361 days younger than Addie), I premade the meatballs (the longest step in the whole recipe) while chatting on the phone with Titi Ruthie, put them in the fridge while I was away, and put them to broil when I finished the rest of dinner.

I also served this with cornbread pudding.

Something I learned by serving this meal is that Addie loves avocado (something she got from Grandma Ana without even knowing it!).  She basically ate half of the avocado that I served.

Happy eating!

Saturday, October 23, 2010

Saturday Recipe Swap: Pumpkin Muffins... With My Little Muffin

Last week was a lesson/ crash course in letting go for me.  Muffins are such a great food to make, carry so many key ingredients, and are easy for little ones to eat.  I remember seeing pictures of Kristi's little ones eating muffins and looking forward to the day that Addie was beyond the oral sensitivity and could eat a muffin (okay, anything!), too.  Well, our day came (after much prayer), and sometimes I can easily forget the struggle we experienced in finding out which foods Addie could eat.

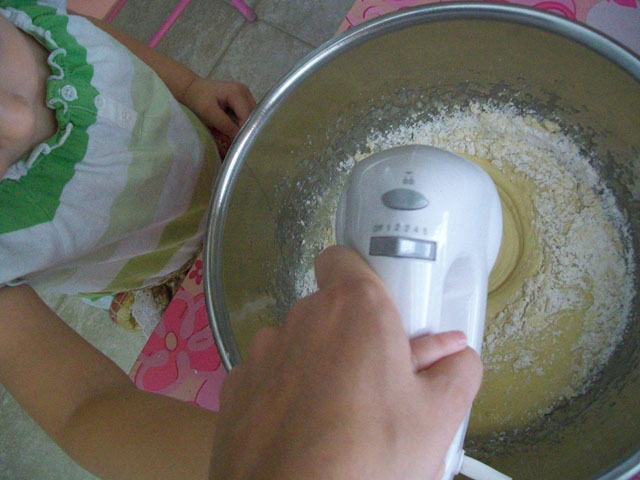
On Thursday of last week, I decided to make some pumpkin muffins.  But I also wanted to let Addie help.  She is with me all the time, and I hate having to tell her to "watch out, Mommy's cooking", so I asked her, "Do you want to help Mommy cook some muffins?"  (She understands "cook".  Bake was an abstract word to her until we made the muffins.)  "Ooohhhh, mussins! Yeah!" and she ran into the kitchen.

I pre-measured everything so there would be very little dead time, put on her little apron (Miss Nancy and Mr. Ernest, you will love the following pictures!), and I sat her down at her little pink school table (which was in the dining room). 

Was there a bit of a mess?  Yes (Mommy was actually responsible for the messes, Addie did extremely well!).  Did it take longer than usual to make these muffins?  Yes.  Was it worth it?  Absolutely!  As I saw Addie sitting in front of the oven waiting for her muffins to come out, and when I heard her tell Daddy all about her "mussins" and how she stirred slow and Mommy stirred fast, I thought to myself, "I will never make mussins by myself again."

Recipe taken from Better Homes And Gardens New Cookbook - 12th Edition

Ingredients:

3 cups sugar
1 cup cooking oil
4 eggs
3 1/2 cups all-purpose flour
2 tsp. baking soda
1 1/2 tsp. salt
1 tsp. ground cinnamon
1 tsp. ground nutmeg
2/3 cup water
1 15-ounce can pumpkin


Directions (as demonstrated by Addie)

1. If doing this with a small child, separate and prepare all ingredients ahead of time so they can truly participate. (I learned that a wet kitchen washcloth can wipe away anything that falls.)


2. Grease your muffin tin and set aside. (This recipe will make lots of muffins, so be prepared to grease your muffin tin a lot!)

3. In a very large mixing bowl, beat sugar and oil with an electric mixer on medium speed. 


4. Add eggs and beat well. Set aside.


5. In a large bowl, combine flour, baking soda salt, cinnamon, and nutmeg.


6. Alternately, add flour mixture and water (second picture down) to sugar mixture, beating on low speed after each addition just until combined.


7. Beat in pumpkin.


8. Spoon batter into prepared tins.


9. Bake in a 350* F oven for 15-20 minutes (loaves are 55-65 minutes) or until a wooden toothpick inserted near the middle comes out clean.  Wait patiently.......


10. Cool in pans on wire racks for 10 minutes.


11. Remove from pans.  Cool completely on wire racks.


12. Enjoy every bite!


Saturday, October 16, 2010

Saturday Recipe Swap: Cheesy Chili Casserole

I am finding myself to be a casserole and crock pot type girl.  Anything that I can prepare early in the day and not have to worry about later works well for me.  This is a dish I made last Wednesday for Brian and Dad and was a huge hit.  I was able to make it and put it together in the early afternoon and put it in the over 30 minutes before I knew Dad was going to arrive.  This would be great served with Cornbread Pudding!

Ingredients

1 2/3 cups uncooked elbow macaroni (6 oz.)
1 medium green bell pepper, chopped
1 medium onion, chopped
1 lb. lean ground beef
1 pkg. taco seasoning mix
Water
8 slices American cheese
1 can (15 oz) mild chili beans in sauce, undrained
1 can (14 1/2 oz.) diced tomatoes, undrained
1 cup frozen whole kernel corn
1/2 tsp. salt

Directions
  1. Preheat oven to 350* F.  Cook pasta according to directions. Drain.
  2. Meanwhile, chop bell pepper and onion.  Cook and stir ground beef, bell pepper, and onion over medium heat 6-7 minutes or until beef is no longer pink.  Drain.  Add taco seasoning mix and amount of water listed on package directions.  Continue cooking according to package directions.
  3. Chop a few slices of the cheese.  Combine chopped cheese, macaroni, seasoned meat mixture, chili beans, tomatoes, corn and salt.  Mix well.  Spoon pasta mixture into a casserole dish.
  4. Bake 30 minutes.  Top with remaining cheese.  Continue baking 1-2 minutes or until cheese just begins to melt.
Yields 8 servings

Saturday, September 25, 2010

Saturday Recipe Swap: Chicken Broccoli Braid

It's been a while since I've posted a recipe, so here is a really good one to make up for me slacking off.  It is from Mom's (my mom's) kitchen and was a winner every time she made it.  I recently came across it again and have to make it for Brian (and Addie, of course).

Chicken Broccoli Braid

3 large chicken breasts
2 cups fresh broccoli (frozen works, too)
1/2 small onion (minced)
1 tsp. lemon juice
dash of pepper
1 cup grated cheddar cheese
1 cup mayonnaise
2 cans of refrigerated crescent rolls 

Directions

1. Cook chicken in 1 cup water. Add salt to taste for 15-20 min. Cool, drain water, and shred chicken.

2. Mix all ingredients together (except crescent rolls). Lay out both cans of crescent rolls. Flatten and press together. Lay mixture into center. Fold ends over the mixture and press ends together. Cut equal slits in dough on both sides of mixture. Cook 375* until golden.

Saturday, August 28, 2010

Saturday Recipe Swap: Rocky Road Marshmallow Candy

Titi Elsie has always made the absolute best desserts.  One that I loved growing up was her Rocky Road Marshmallow candy.  Unfortunately, it is one of those can't-just-have-one treats.  I hope you enjoy this recipe.  It is also great to use at Christmas as a gift or as a treat for guests.... or your family.... or yourself....

Rocky Road Marshmallow Candy

Ingredients

  • 1 pkg. (12 oz.) semi-sweet chocolate chips
  • 1 cup chunky peanut butter
  • 3 cups miniature marshmallows
  • 1/4 cup chopped nuts
Directions
  • Microwave chocolate chips and peanut butter on high 2 to 3 minutes until melted.
  • While stirring, fold in marshmallows and nuts.
  • Spoon into a greased 9 inch square dish/pan
  • Chill until firm and then cut into squares.

Saturday, August 7, 2010

Saturday Recipe Swap: Harvest Rice Pilaf

Last week I shared with you Creamy Chicken Pot Pie.  One of the ingredients was 1/2 cup of chicken broth.  However, once you have used the 1/2 cup, you are left with a mostly full can of broth still to be used.  So what are you to do?  Add some water to the can to fill it up, and make this dish!  The recipe was on the label of the College Inn chicken broth that I had been using, and it is absolutely delicious!

Harvest Rice Pilaf (4-6 servings)
Prep time: 15 minutes
Cook time: 30 minutes

Ingredients

1 medium onion, chopped
1 stalk celery, chopped
1 Tbsp. olive oil
1 cup long grain white rice
1 can (14.5 oz.) chicken broth
1 can (3 0z.) sliced mushrooms, unstrained
1 tsp. basil
1/4 tsp. sage
1 1/2 cups cooked chicken or turkey (I used cooked steak)
1/4 cup dried cranberries
1/4 cup toasted pecans, chopped (I left these out since Brian doesn't care for nuts in his food)
Black pepper, to taste

Directions

  • Cook onion and celery in oil until tender (I added some crushed garlic to this step).
  • Add rice; cook, stirring constantly, 3 minutes.
  • Stir in broth, mushrooms, basil, and sage.
  • Bring to boil; reduce heat.
  • Cover and simmer 12 minutes.
  • Add turkey and cranberries; cover and simmer 5-10 minutes until liquid is absorbed.
  • Mix in toasted pecans just before serving.
  • Season with ground black pepper to taste.

Saturday, July 31, 2010

Saturday Recipe Swap: Creamy Chicken Pot Pie

Yesterday, I mentioned that Dad came over for dinner on Wednesday.  That is one of the ways our week flows around here.  Every Wednesday evening, we can look forward to a visit from "Papa".  Addie loves to help him undo the straps to his Velcro tennis shoes.  Sometimes she pulls him into her room and says "Down" so he can play with her.  Sometimes if her "moo-die" is on so I can finish getting dinner ready and on the table, she will pull him into the living room so he can enjoy her "moo-die" too.

As a teenager, my job was to clean up the kitchen after each meal.  When we lived in New Jersey, we did not have a dishwasher...I take that back. I was the dishwasher.  Needless to say, I began hating greatly disliking being in the kitchen.  Dad used to tease me by saying that when I got married, I would serve dinner on paper plates and cook TV dinners. However, once I got married, the idea of cooking for my husband really hit home for me and I began to love cooking!  What is slightly ironic about Dad coming for dinner now is that he gets a good home-cooked meal from me each week served on real dishes! 

Today's recipe is what I served this past Wednesday for Brian, Dad, and Addie.  It is Creamy Chicken Pot Pie from a free pamphlet cook book that Sam's Club and Kraft collaborated on last year.  I have gotten some great recipes from this little book.  Although they name specific brands to use for the different ingredients, I always find the generic brand or what is on sale and it turns out just as good.

Creamy Chicken Pot Pie

What You Need

1 pkg. (8 oz.)  Philadelphia Cream Cheese, cubed
1/2 cup chicken broth
1 lb. cooked Tyson boneless skinless chicken breasts, cubed (about 3 cups)
16 oz. frozen mixed vegetables, thawed
1/2 tsp. garlic salt
1 egg
1/2 cup milk
1 cup all-purpose baking mix

Make It

Heat oven to 400* F.

Cook cream cheese and broth in large saucepan on low heat until cream cheese is completely melted and mixture is well blended, stirring frequently with whisk. Stir in chicken, vegetables, and garlic salt.

Spoon into 9-inch pie plate. Beat egg and milk in medium bowl with whisk until well blended; stir in baking mix just until moistened. Spoon over chicken mixture. 

Place pie plate on baking sheet.

Bake 25 to 30 min. or until golden brown.

Don't forget to go over to Kristi's blog to check out her recipe for today.  Also, be sure to let her know how you like her new look!

Saturday, July 3, 2010

Saturday Recipe Swap: Ultimate Meatloaf

I married a meat and potatoes kind of man.  So when he looked in the fridge at what I had on hand the other day, he asked if I could make meatloaf, mashed potatoes, and corn on the cob.  Absolutely!  Over the last one-week-short-of-six-years of marriage, I have made many variations of meatloaf for my hubby.  In fact, the first meal I cooked for us after our honeymoon was a meatloaf dinner because Brian had always raved about his mom's meatloaf (I wasn't trying to outdo her meatloaf. I was just trying to make something I knew Brian liked...just to be clear on that subject.).  However, that night, we had some impromptu guests for dinner- my mom and pops-in-law!  A little nerve wracking but nice. 

The recipe for today is not the recipe I cooked that first time, but one I found in the Fall 2006 issue of Kraft Food and Family.  It is super easy, super quick to put together, and super delicious.  I am also going to show you how I based this entire meal around store sales and deals.

Publix was having a sale on their corn on the cob- 10 cobs for $2.  I bought all 10. Publix also had a deal on their Simply Potatoes side dishes- Buy One Get One free.  Those were the two sides that Brian saw in fridge and asked for.  The ground beef was $1.89 per pound and the meatloaf required 2 pounds.  I also used the generic store brand of stuffing mix that the recipe required.  An inexpensive yet delicious dinner for two (Brian and me) and a half (Addie). 

This meatloaf also makes a great meatloaf sandwhich for lunch.  I think that's why Brian asked for meatloaf.  He wanted some meatloaf sandwhiches for lunch!

Easy Pleasing Meatloaf

Prep: 10 min. | Total: 1 hour 10 min.

2 eggs, beaten
2 lb. lean ground beef
1 pkg. (6 oz.) Stove Top Stuffing Mix for chicken (I used pork flavored generic stuffing mix)
1 cup water
1/2 cup Kraft Original Barbecue Sauce, divided

  1. Preheat oven to 375* F. In a small bowl, beat eggs lightly with a fork.  This makes it easy to incorporate them into the meat  mixture, so you won't have to overmix.
  2. Place lean ground beef, stuffing mix, water, beaten eggs and 1/4 cup barbecue sauce in large bowl.
  3. Mix all ingredients with wooden spoon just until blended. (I just took off my rings and mixed with my hands.)
  4. Shape meat mixture into an oval loaf in a 13x9-inch baking dish. Using a large baking dish makes it easier to pour out and discard excess fat.
  5. Top meatloaf with remaining barbecue sauce.
  6. Bake 1 hour or until cooked through (It takes me about an hour and a half).  No need to guess when meatloaf is done cooking; just use a meat thermometer to check that the center has reached 160* F.
Makes 8 servings.

Saturday, June 26, 2010

Saturday Recipe Swap: Banana Bread

It was a Friday or Saturday evening a few weeks ago.  Dark clouds loomed overhead. In fact, the conditions were perfect for severe weather and possibly tornadoes.  I went over our plan with Brian if, God forbid, a tornado did come.  Where should we go? Experts say to go into the most central room in your house that does not touch any outside walls.  Somehow, the builders here in Florida missed that very important point, because almost all rooms touch an outside wall.  Our best bet is either the master closet or Addie's closet and neither are my favorite choices.  We also discussed grabbing Addie's mattress to throw on top of us. 

We continued what we were doing: Brian watching sports, Addie running around having the time of her life as always, and me cleaning the kitchen while checking out the window every so often.

I had just finished cleaning up the kitchen when I noticed the over ripe bananas on the counter.  I didn't want to just throw them away.  What could I make with them instead?  I pulled out my trusty Better Homes and Garden Cookbook and made following the recipe below to make a delicious bread (p.119).  The whole time, I just prayed that we didn't lose power so the bread could finish baking. 

After all was said and done, God protected us. We just had a lot of rain, thunder, and lightning (all of which I can live with) and a warm, delicious banana bread to enjoy.  Even Addie loved it and had it for breakfast a few times.
Banana Bread
Prep: 25 min.
Bake: 55 min.
Oven: 350* F
Makes: 1 loaf (16 servings)
2 cups all-purpose flour
1 1/2 tsp. baking powder
1/2 tsp. baking soda
1/4 tsp. ground cinnamon
1/8 tsp. ground nutmeg
2 beaten eggs
1 1/2 cups mashed bananas (5 medium)
1 cup sugar
1/2 cup cooking oil or butter or margarine
1/4 cup chopped walnuts (I leave these out since Brian doesn't like nuts in his food)
1 recipe Streusel-Nut Topping (I also left this out...I was going for quick and simple)
  1. Grease bottom and 1/2 inch up the sides of one 9x5x3-inch or two 7 1/2x 3 1/2x2- inch loaf pans; set aside.  Combine flour, baking powder, baking soda, cinnamon, nutmeg, and 1/4 teaspoon salt.  Make a well in center of flour mixture; set aside.
  2. In a medium bowl combine eggs, bananas, sugar, and oil.  Add egg mixture all at once to flour mixture.  Stir just until moistened (batter should be lumpy) Fold in nuts.  Spoon batter into prepared pan(s).  If desired, sprinkle Streusel-Nut Topping over batter. 
  3. Bake in a 350* oven for 55 to 60 minutes for 9x5x3-inch pan, or 40 to 45 minutes for 7 1/2x3 1/2x2-inch pans, or until a wooden toothpick inserted near center comes out clean (if necessary, cover loosely with foil the last 15 minutes of baking to prevent over browning). Cool in pan on a wire rack for 10 minutes.  Remove from pan.  Cool completely on a wire rack. Wrap and store overnight before slicing. (We sort of skipped that last sentence)
  4. Streusel-Nut Topping: In a small bowl combine 1/4 cup packed brown sugar and 3 tbsp all-purpose flour.  Using a pastry blender, cut in 2 tbsp butter until mixture resembles coarse crumbs. Stir in 1/3 cup chopped walnuts. 

Saturday, June 12, 2010

Saturday Recipe Swap: Blueberry Crisp


After a bit of snacking on our freshly picked blueberries and making pancakes from them, I still had two Ziploc bags worth of frozen blueberries left over. What to do? Blueberry Crisp, of course! This is another recipe from the Better Homes and Gardens CookBook.

Blueberry Crisp

Ingredients:

  • 5 cups fresh or frozen blueberries
  • 4 tbsp. granulateed sugar
  • 1/2 cup regualr rolled oats
  • 1/2 cup brown sugar
  • 1/4 cup + 3 tbsp. all-purpose flour
  • 1/4 tsp. ground nutmeg, ginger, OR cinnamon
  • 1/4 cup butter or margarine
  • 1/4 cup chopped nuts or coconut (Brian doesn't like either so I leave these out)
  • Vanilla ice cream (optional)
Directions

  • For fruit filling, thaw fruit if frozen. Do not drain. Place fruit in a 2- quart baking dish. Stir in the granulated sugar and 3 tbsp. all pupose flour.
  • For topping, in a medium bowl combine the oats, brown sugar, flour, and spice. Cut in butter until mixture resembles course crumbs. Stir in the nuts. Sprinkle topping over fruit.
  • Bake in a 375* F oven for 30-35 minutes or until fruit is tender and topping is golden. If desired, serve warm with ice cream.

Saturday, June 5, 2010

Saturday Recipe Swap: Blueberry- Cornmeal Pancakes

All pictures from today's post were taken with my cell phone camera.  You will see some discoloration in some of the photos.
Last week, the Thursday before Memorial Day, my aunt and cousin invited me and Addie to go blueberry picking with them.  It was a very busy day for Addie Girl and me, but this hour time period gave us the most wonderful, relaxing time during our uncommonly busy day.   We went to an organic farm (not that that helped us make the decision to go there) on my aunt's road.  Upon driving through the gate we were greeted with field upon field of blueberry bushes all ready and waiting to be picked.
"Tih-teh"- Addie's version of the words chicken.  You moms know the translations of your child's language.  Addie loves animals so she was thrilled to see the chickens.  I was almost afraid she wasn't going to be inerested in picking the blueberries.

My cousin's twin daughters are Addie friends.  She loves seeing them, and they love playing with her.  She was the first baby they ever got to experience from the hospital room up to where we are now.  They are ever amazed at what Addie is able to do or say each time they see her.
I only had to show Addie what to do with the blueberries one time.  She got the hang of it immediately and was going to town collecting.  Because she is so small and had a vantage point that none of the rest of us had, she saw blueberries down inside the bushes that we couldn't see.  Sometimes, she would put her whole body in a bush just to get the blueberries she saw.

Having her know her colors was very helpful.  She had collected a few green berries and tossed them into the bucket.  I showed her the green ones, and told her, "No green.  Pick blue ones."  She put the green ones in her hands on the floor and started picking the blue ones again.  Most of what you see in the bucket, she collected.

I kept asking her if she wanted me to hold the bucket, but she always answered "No".  Then at one point towards the end, she handed me the bucket and said, "Is heavy."  I had no idea she knew the word heavy, let alone what it meant or how to use it in a sentence ("is heavy" counts as a sentence to me)!

You know those moments when God turns your attention to a spot that you have absolutely no reason to look at?  I had one of those moments that day.  For "some reason" I looked down at Addie's foot to see that she had just stepped into an ant hill (here in Florida we have red fire ants which have a bite that burns and hurts).  The ants had just begun climbing her sneaker.  After yelling, "Dear Lord!", I picked her up and took the basket out of her hand at the same time, yanked off her sneaker and sock, and threw them on the floor.  Only two ants made it onto her foot but I squished them immediately.  She looked at me like, "Mom, what came over you?" I had to thank God for my choice in footware for her that day.  I had debated between putting on her sandals to keep her feet cool or putting on the sneakers and socks to keep her feet clean (I know, why am I always thinking about clean?).  The latter reason overruled the former, and I put on the sneakers.  Had she been wearing sandals, I would never have gotten to her feet in time.  The ants would have been inside the slits in no time. After it was all said and done, I looked back at where she had been standing.  The ground was literally moving with hundreds of red fire ants. 

I wanted to make something with the blueberries that we collected that day.  For breakfast on Friday morning, just before we began packing for our trip down south, Brian asked if I could make pancakes.  I had no pancake mix, but I love using my cookbooks and making things from scratch.  So I looked for a pancake recipe.  And low and behold, I found a recipe in the Better Homes and Garden Cookbook for Blueberry Pancakes.  When I first told Brian what I was going to make, he wasn't too thrilled, he later told me.  But after tasting them, they have become a favorite for him.

Blueberry- Cornmeal Pancakes

Ingredients

  • 1 cup all-purpose flour2 tbsp cornmeal
  • 1 tbsp sugar
  • 1 tsp baking powder
  • 1/2 tsp baking soda
  • 1/4 teaspoon salt
  • 1/4 tsp ground cinnamon
  • 1 beaten egg
  • 1 cup sour milk or buttermilk (recipe for sour milk given below)*
  • 2 tbsp cooking oil
  • 1 cup fresh or frozen blueberries
  • Syrup
Directions
  • In a bowl combine the flour, cornmeal, sugar, baking powder, baking soda, salt, and cinnamon.  Make a well in center of flour mixture; set aside.
  • In another bowl stir together egg, milk*, and oil.  Add egg mixture all at once to flour mixture.  Stir until just moistened (batter should be lumpy). Gently fold in blueberries.
  • For each pancake pour or spread about 1/4 cup of the batter into a 4 inch circle onto a hot, lightly greased griddle or heavy skillet.  Cook over medium heat about 2 minutes on each side or until pancakes are golden brown, turning to second sides when pancakes have bubbly surfaces and edges are slightly dry.  Serve warm.  If desired, top with syrup. 

Saturday, May 15, 2010

Saturday Recipe Swap- Old Fashioned Rice Pudding

Yesterday was my clean-out-the-refrigerator-check-which-leftovers-I-can-turn-into-dinner-tonight day. One of the leftovers I had was about 2 1/2 to 3 cups of cooked white rice. I knew I wouldn't be using it as part of our dinner (believe it or not, Brian requested a frozen pizza for dinner so he could eat the leftovers for lunch while I am out today), but I also didn't want to just get rid of it. I went looking through one of my many cookbooks to see how I could use the leftover rice as something completely different from how I would usually use it. The recipe that caught my eye was this one from Fix-It and Forget-It Cookbook p. 238. Quick, easy and it passed the Brian likes it test!

Don't forget to check out Kristi's blog to see what she has cooking in her kitchen.


Old-Fashioned Rice Pudding


Ingredients


  • 2 1/2 cups cooked rice
  • 1 1/2 cups evaporated milk (or scalded milk)
  • 2/3 cup brown or white sugar
  • 3 Tbsp. soft butter
  • 2 tsp. vanilla
  • 1/2-1 tsp. nutmeg
  • 3 eggs, beaten
  • 1/2- 1 cup raisins

Directions

  • Mix together all ingredients. Pour into lightly greased slow-cooker.
  • Cover and cook on high 2 hours, or on low 4-6 hours. Stir after first hour.
  • Serve warm or cold.

Saturday, May 1, 2010

Saturday Recipe Swap- Lazagna Roll Ups and a Quick Deal

In all honesty I have not made these in years. It is a recipe I got from an old cookbook I had bought myself while waiting for God to send "the one" for me. They are absolutely delicious. Instead of using lazagna, you could even use jumbo shells with the filling. It is a great make ahead dinner also.

One thing I would recommend is that you read through the directions before attempting. They seem long and tedious, but they really aren't.

Now that I think of it, I might surprise Brian with them sometime this week...or next week. Shhh, don't tell him!

Lazagna Roll Ups

Ingredients

  • 8 oz. (9 pieces) lazagna noodles
  • 2 c Ricotta cheese
  • 1/2 c shredded mozarella cheese
  • 2 tbsp Parmesean cheese
  • 2 tbsp dried parsley flakes
  • 1 egg
  • dash of salt
  • dash of pepper
  • 1/2 tsp oregano
  • 1 3/4 c spaghetti sauce

Directions

  • Preheat oven to 350* F or you can use a microwave.
  • Cook lazagna noodles according to package directions; drain well.
  • Separate noodles and lay out flat on waxed paper or aluminum foil to keep from sticking
  • Combine ricotta, mozzarella, parmesean, parsley flakes, egg oregano, salt and pepper for filling in medium mixing bowl.
  • Spread about 1/4 cup of cheese filling on each noodle to within 1 inch at one end.
  • Beginning at filled end, roll up noodle in jelly roll fashion.
  • Pour about 3/4 of the sauce on bottom of 9x11 inch microwavable dish or casserole dish.
  • Place roll ups seam side down in single layer in pan.
  • Cover with remaining sauce.
  • Sprinkle with additional parmesean cheese if desired.
  • Cover with waxed paper; microwave on high for 8-12 minutes or until filling is hot and bubbly, or cook in over for 20 minutes.

************************************

Woohoo! What a little extra sleep will do for a body. No waking up before dawn for me today! For those of you who live in the Tampa area, Mosi (the Museum of Science and Industry) is have a $5 day today. Not only do you get access to the museum itself, but from my understanding, you also get a movie and a planetarium viewing. Have a great Saturday!

Saturday, April 24, 2010

Saturday Recipe Swap- Mashed Cauliflower

This is a really quick, easy, healthy alternative to mashed potatoes. If your food processor is a fairly good sized one, then your experience making this will be less adventurous than my first time making this as a newly wed with one of those mini processor deals. I thought I would never finish!

Mashed Cauliflower
  • 1 medium cauliflower head
  • 2 tbsp. cream cheese
  • Parmesean cheese
  • Salt to taste

Directions

  • Boil cauliflower for 10 minutes.
  • Put cauliflower and cream cheese (and a dash of salt) in food processor until mashed and creamy.
  • Sprinkle with Parmesean Cheese to serve

Saturday, April 17, 2010

Saturday Recipe Swap- Baked Ziti

From yesterday's post, here is the quick recipe for what I did to make baked ziti from purposely, previously cooked meals. This recipe uses the Semi Homemade Spaghetti Sauce from this post. The only extra ingredients I use in it are shredded mozzarella cheese and ricotta cheese.
  1. Put leftover sauce in a large pot to warm up. Set stove to about medium heat.
  2. Add about a cup of Ricotta cheese to the sauce and stir. Mix until completely blended.
  3. Add previously cooked ziti and continue stirring.
  4. Add about a cup of shredded mozzarella cheese and keep on sirring.
  5. Pour all contents of pot into a baking dish big enough for the amount of mix you have.
  6. Cover mixture with shredded mozzarella cheese. 7. Bake at 350* F for about 45 min. or until cheese is melted.

LinkWithin

Related Posts with Thumbnails