I love November and December because of the anticipation of Thanksgiving and Christmas Eve, Christmas Day, and New Years, but I generally overlook October. I think Hallowe*n plays a big part in my dread of the month. From late August through September you see simply awful things displayed in stores and trying to keep a curious 2 year old from looking at the ugliness is not always easy. Once October finally comes, the creepiness shows up during commercials and one has to have a quick trigger finger in order to keep some pretty horrible images from being imprinted in the minds of our little ones (and our own for that matter).
However, I love the feeling of fall. The cool mornings and evenings, the falling leaves, seeing pictures of leaves turning color (let's face it, for Floridians pictures are all we have!), seeing harvests of pumpkins, and going to corn mazes and pumpkin patches. So I decided to do a simple version of fall decorating this year. I pulled out my Cracker Barrel pumpkin shaped pie dish and its matching accessories and placed them on our side buffet table (which means temporarily moving the usual plant decor).
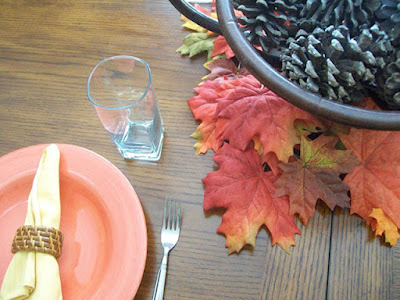
I also took a wreath of fall leaves I had and placed my basket of vanilla wax covered pine cones in the center for our dining room table. I am also using our autumn colored dishes during this time. (Addie says, "It's head-y" as she walks them one-by-one to the sink for me to rinse off.)
I also took some felt leaves that I had cut out a couple of years ago and did a quick project in about 30 minutes with the help of my little assistant using only what I had on hand. Step by step photo directions are below.
For this project you will need: leaves (store bought would be even prettier than my felt ones or use some construction paper and make your own leaves by tracing the hands of your children or your whole family), some kind of string (fishing line would make your leaves look like they are floating), scissors (for mommies, daddies, or older children only), a needle (also for an adult or older children), and thumb tacks (also for bigger people).
Using the needle and string, draw the string through any point in your leaf.
Tie a knot at the end of the string or around the point in your leaf (as shown below).
Tie another knot at the top of your string, creating a loop as you make your knot.
Put your thumb tack above your windows in some way. I stuck mine into the wood on the backside of our cornices.
Hang your leaves on the thumb tacks. (Little people can help by bringing you the leaves to hang.)
Although Addie was with me during the entire process (playing with the leaves when they weren't being strung and handing them to me to hang), she still oohed and aahed every time she came out of her room and saw them hanging.
One thing that will help in the simplicity of fall decorating for next year is that I will be putting all of my fall related decorations in one tub and labeling the tub (I may even pick up a fall colored tub). That way, next year when I ask Brian to go up into the attic, he will be able to easily locate what I want.

.jpg)


suzie, your home looks gorgeous!!!!
ReplyDeleteWhat a pretty table setting!
ReplyDelete