
.jpg)
For the last two years I have participated in Ali Edward's December Daily (button on the side bar). December Daily is a scrapbook of the first 25 days of December or the entire month if you so choose. Each day you take pictures and write a little bit in order to remember your Christmas (or other December holiday). I have thoroughly enjoyed this project and look forward to it each year.
My favorite part of the album is that it is prepared in advance so that when December comes there is very little thinking involved. No sitting at my craft table trying to come up with a creative idea when I am overloaded with brownies, coffee, cookies, coffee, gift wrapping, coffee, or family time.... and have I mentioned coffee?
Part of the fun for me about this album is that it gives me a chance to use those cool little things I have picked up throughout the year (or had left over from last year). Some of you (Cathy and Kristi) may even recognize a couple of things that you had given me that found their way into this album. This album does not have matching pages, pages are not a specific size, and anything can make its way into it.
During the month of December, I will be doing a weekly post which will cover the previous days in that week and show you a before and after look at what I have done with the pages and my pictures together.
So without further ado....
This is the cover of the album. Once the project is over, I think I am going to add a red ribbon down the front with a bow to finish it off.

I decided to print out what we value at Christmas time. I all honesty, I just couldn't wait to add something to my album (I completed the foundation pages back in October).

I'm not sure if I am going to go with this idea or not, but I was thinking about doing an extra page here in the front of the album recognizing my love of Black Friday shopping and decorating the house. These are both things that occur before December but are so vital to the rest of the month. The jury is still out on this one....
For Day 1, I took a baseball card holder and sliced it so that I was left with four pockets. On the computer I made the little "one" and printed it out. I also resized two pictures of Addie from her first two Christmases and slipped them in. I have one pocket left where I will put another picture of Addie this year in front of our tree and snowman. (You will see these pictures again in a couple of weeks)
I am not going into detail about the backs right now, but I have included a little bit of the backs for you to see what I have done with them. When I do the album, I will have the back of one page and the front of the next page as one complete day so that when you open the album you will have a complete view of each day with out having to turn the page.
Also, in relation to the pictures, these are 2.5 x 3.5. I can fit 2 onto a 4x6 print. So anytime I need to make photos in this size, I can save a little in the process.

For Day 2, I now have 3 spaces for small pictures (the back of Day 1) and one larger picture.

Day 3 gives me a chance to put one large photo (8x6) and a smaller photo or journaling on the back of page 2. Yes, I ran the page protector through the sewing machine to hold my elements in place and to create the photo size I wanted.

I took a 12x12 page protector that comes with 6 (6x4) photo pockets and sliced it down to fit this album giving me two photo pockets. I still have an 8x6 spot on the back of day 3 to fill as I want.

For this page, I shrunk an Ali Edwards overlay that I already had down to fit a 6x8 page, printed it out, cut off the excess paper, and sewed my page protector to fit. For the page front and back, my options are limitless. This is where the fun comes in (and maybe I will still have to do some thinking) about how I want the completed page to look.

Right now, this card is just acting as a place holder. I am looking for a really pretty red envelope that I can punch holes through to put here. My goal is to write Addie a little letter to put into the envelope.

Do you remember my baseball card holder from Day 1? These three little pockets are from the same sliced up page. It gives me space to put 3 3.5 x 2.5 photos.

Page 8 looks plain right now, but my goal is to make a 4x8 page to go inside (or even slip our Christmas card in it). Remember my 8x6 page (which I will most likely do on my photoshop program)? I will layer that onto an 8x10 page, add a 4x8 page to it, and print it out as an 8x10. This way I will be able to save a bit on developing my photos and I can make some pages in fun sizes.

This was one of the filler pages to a mini photo album I did for the grandparents for Grandparent's Day a couple of years back. I just sliced off one little side to allow the page to fit. Once my photo is in place, I will add the stickers.

The back of Day 9 will hold my photo for Day 10 since I have made Day 10's front side a journaling page. The journaling spot is one of Ali Edwards December 4x6 overlays that I adjusted to my liking, printed in red, and then adhered, slicing off the bottom.
This page itself originally looked like the place holder for Day 6. I covered the page with patterned paper and rounded the corners. That is the fun of this kind of album. You take what you have on hand and turn them into what you want them to be.

Day 11 is very much the same as Day 5.

Day 12 is just like Day 1. I just cut a 2.5 x 3.5 inch piece of patterned paper, added two number stickers, and slipped it into one of the slots.

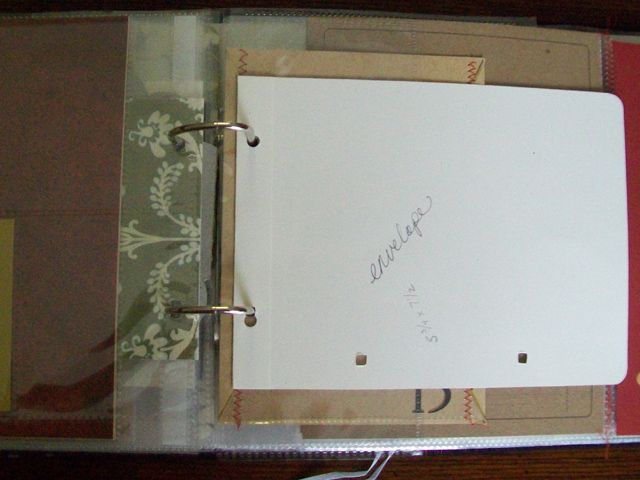
Day 13 has a place holder right now. The card says envelope, but I have another idea right now. I have a Christmas tree chipboard page that I have cut to fit on the page. I am debating whether to use it here or go with the envelope idea.
Day 14 is the same as Day 7.

Day 15 is one of my favorite pages. I have had this invitation holder for so many years, and each year I try to come up with a fun use for it, to no avail. This year I slipped a piece of page protector into it, sewed along the sides and made a little pocket page where I can slip some bits of this and that from our day, I can write a note and slip it inside, slip a photo inside and cover the back of the photo with paper and journaling... do you see how the possibilities are endless with this project! Oh, I just talked my self into using the tree on day 13 since I have a pocket here on day 15! Thanks for your help :)

Day 16.... not much to say.

Day 17 is just like day 9. However, I am thinking that I need to move the numbers (recognize them, Cathy?) onto the photo since they are a little hard to see because of the holly design on the paper.
For some reason, I don't have my full photo for Day 18. It is just like Day 1 except I have put a flower with the number 18 on the leaves into the pocket and sewed it shut to keep my element in place.

Day 19 is another cut up page protector with two photo pockets. Cathy, these black letters and numbers were so handy! Thank you!

Day 20 is a plain page protector. I wanted to give myself a chance to do a digital page to add something different into the album.

This little index card has been in my stash since at least 2003. He finally has a home! I may cover it with a photo and add a sticker to it, or may cover it with a grid or lined patterned paper and use it as my journaling space.

Recognize the envelope, Cathy? Still unsure of exactly how I will fill it, but how fun would it be to look back years from now and find receipts from a last minute run to the store, or a scribbled note, or a grocery list, or a used up Starbucks gift card?

The next two are rather self explanatory since they are pages you have seen before.


Now we all know that tons of pictures are taken on Christmas morning. So I needed to give myself ample room to put all of my favorite photos from the day. Kristi, my friend, do you remember this little doozie of an album? It fit what I needed so perfectly! There are 12 5x5 pages inside so I can store all of my favorite pictures from the morning and day. I also added a clear Christmas verse sticker to the top and Cathy's numbers to the bottom corner.
I adhered the mini-album to a kraft piece of card stock in order to have an actual page to work from.


In our family (the extended side of my family), Christmas does not end on the 25th. However, last year I continued the album for the rest of the year and found myself burned out. So this year, I have added one final page which is simple labeled "More Celebrations" where I can add all of the Christmas events that we will experience after Christmas is "officially" over. If needed, I can always add more photo holding pages behind this page.


I hope you enjoyed a peek into my December Daily Album. I look forward to showing you the completed pages throughout the month of December.

cannot wait to see it in person!! You must help me do a scrapbook too!
ReplyDeletecute book...i love what you've done!!
ReplyDeleteLove your design, great job!
ReplyDelete